Electic over Hydraulic Disc Brake Conversion
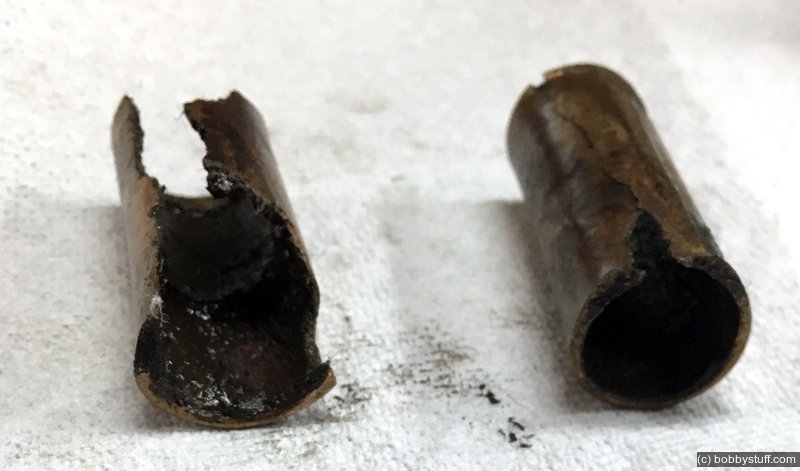
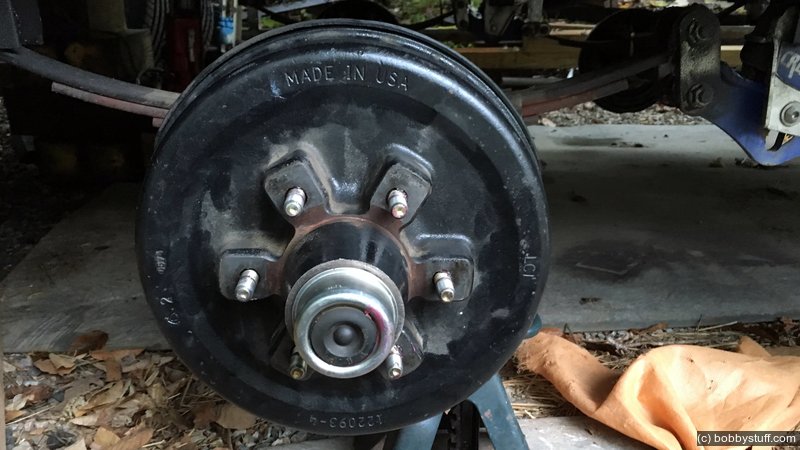
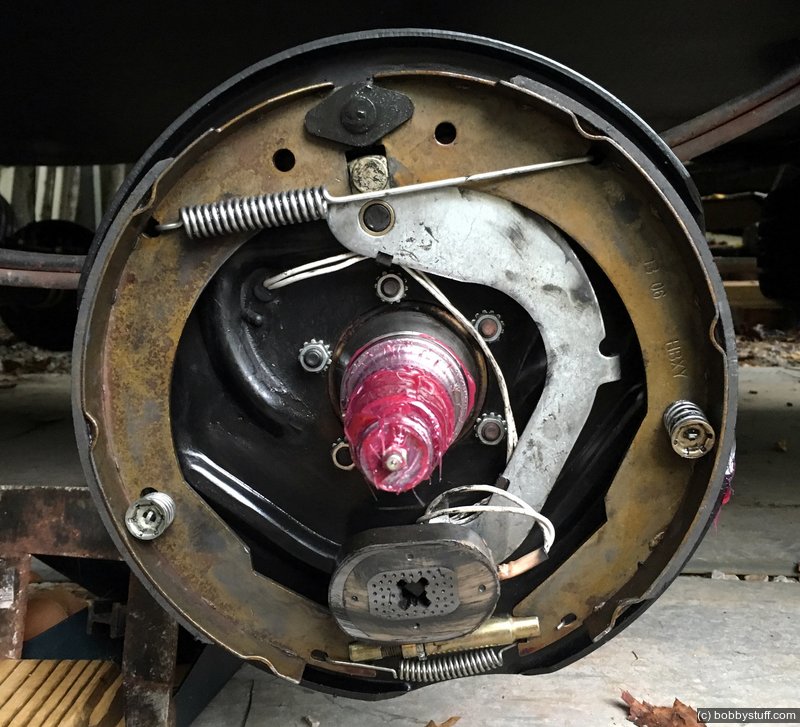
We had to cancel a three week trip across country recently because of family issues. In preparation for the trip I had removed the four hubs on Vickie the Toy Hauler to check the brakes and found the usual problems. The grease seals on the two curbside hubs had failed and the brakes were coated in grease. One magnet fell out as I was removing the hub. On the traffic side both magnets where severely worn and had cut deep groves in the hub facing. I cleaned and patched everything up.
Vickie only has about 10,000 miles on her. I had done the same inspection and clean up when she was brand new.
So with our trip canceled I decided to upgrade my 60's technology drums and brake shoes with a modern disc brake system. I did a lot of searching on the web and everyone who had done the upgrade wished they had done it years before. They said they would never have an RV again that did not have disc brakes. Similar to folks who upgrade from a 1/2 ton truck to something larger for towing.
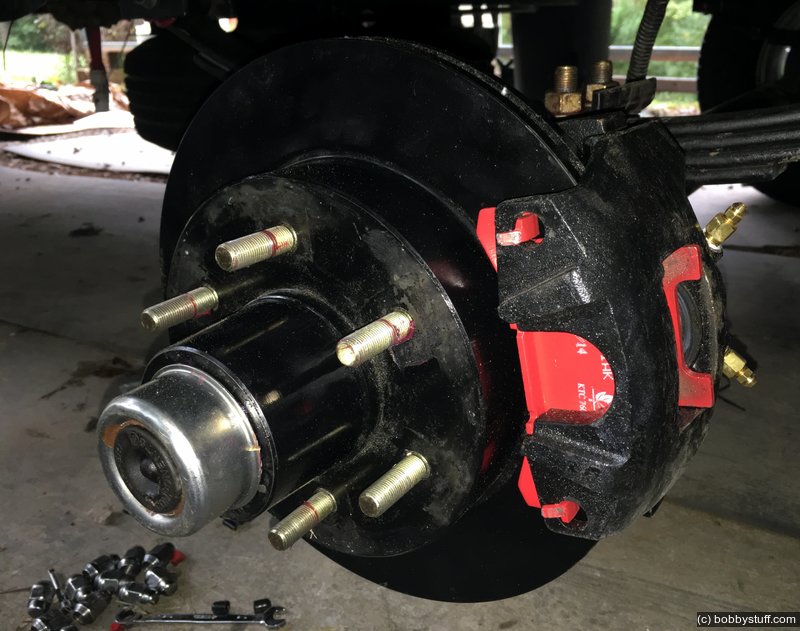
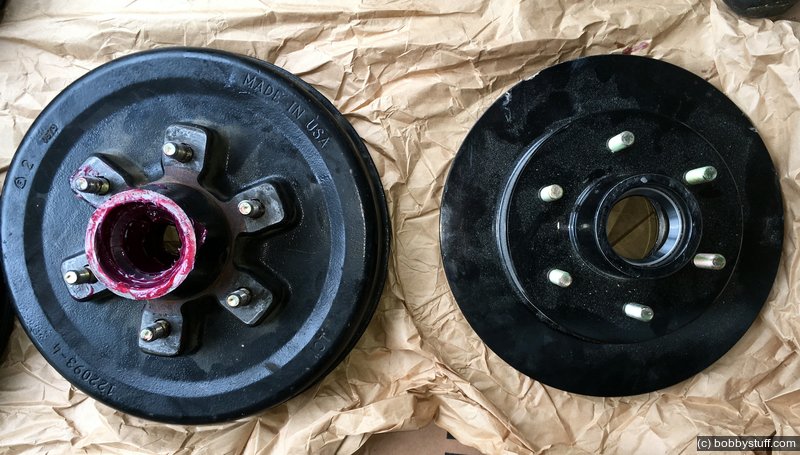
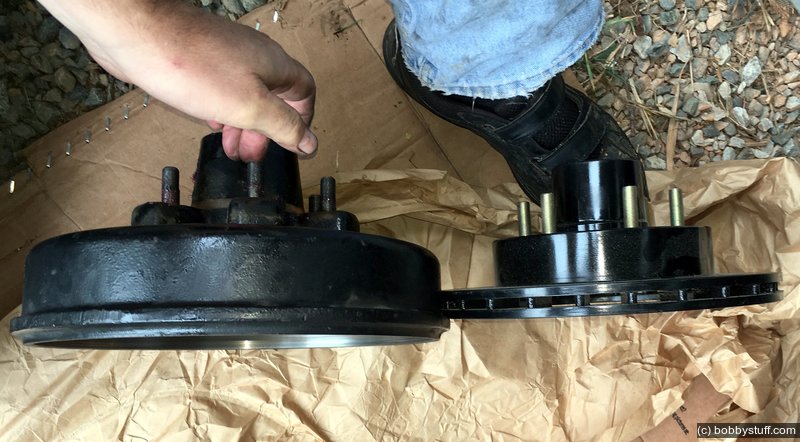
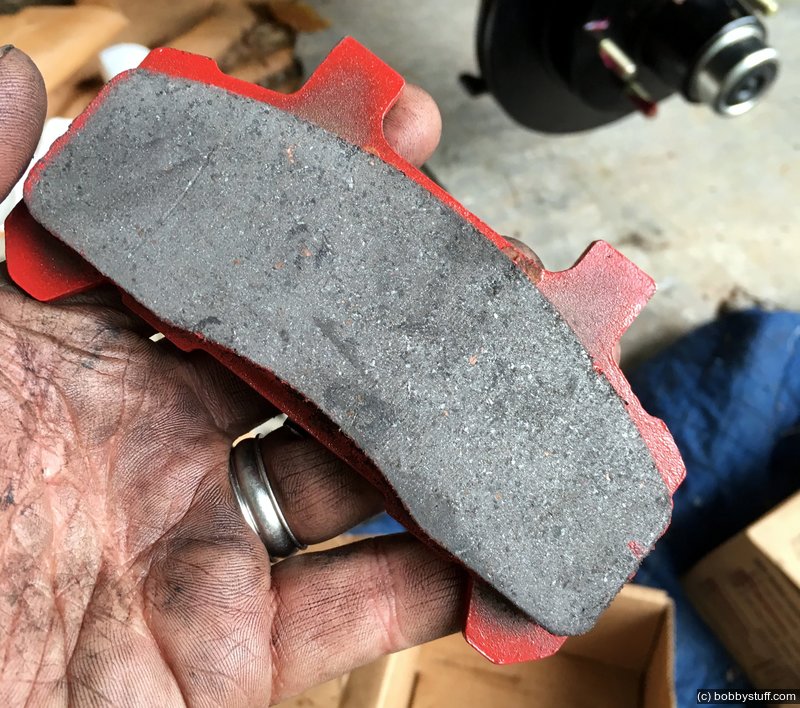
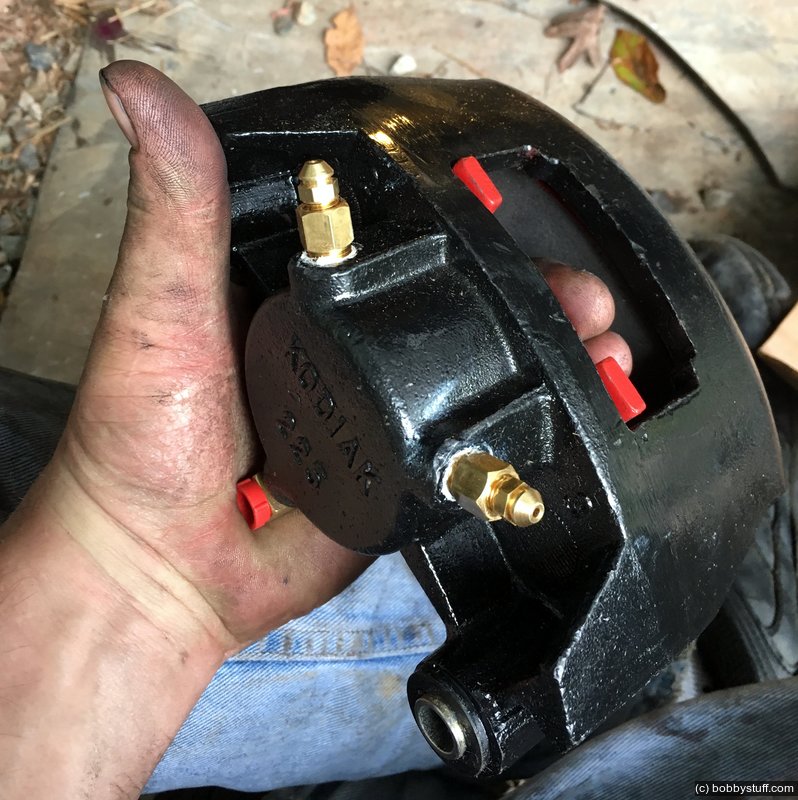
It did not take long to find that Kodiak disc brake conversion kits are the way to go. They make slip on disk brake kits that leave your current hub in place and add a rotor. They also make a complete replacement rotor and hub that replaces the existing hub and brake drum. I chose this route for several reasons. It is a cleaner install, I will be able to check for blown grease seals without removing the hub and the outer bearing that comes with the rotor is the one used on 6,000 lb axles.
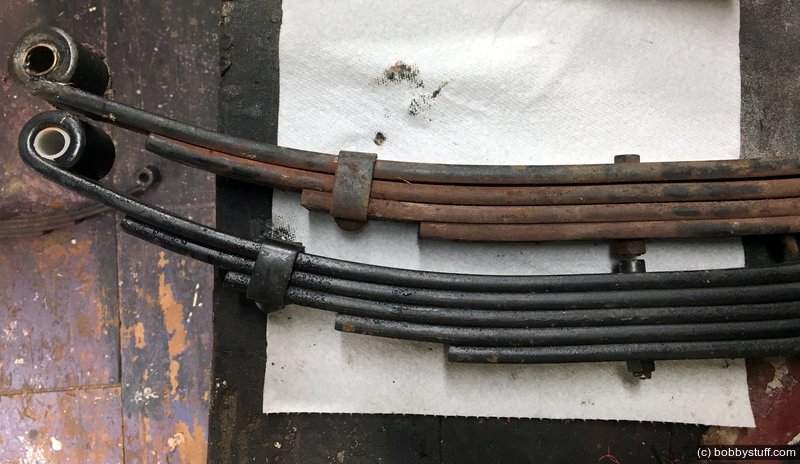
The other parts required are the electric over hydraulic actuator and the brake lines. Because of my previous leaf spring problems I decided to also upgrade the springs to those used on 6,000 lb axles. My axles are 5,200 lb Lippert axles. I have purchased several items from eTrailer.com over the years and they are top notch. I purchased the actuator from them. But another company, KodiakTrailerBrakes.com had a better disk brake kit that included bearings and seals.
So my parts list from KodiakTrailerBrakes.com is:
| Qty | Part | Price |
|---|---|---|
| 1 | 100992 Tandem Axle Boat Trailer Brake Line Kit Long 24ft for Hydraulic Brakes Disc or Drum | $108.24 |
| 2 | 100852 Kodiak Integral Disc Brake Kit E Coated 6 Lug 5200 lb Trailer Axles | $263.22 ea |
From eTrailer.com
| Qty | Part | Price |
|---|---|---|
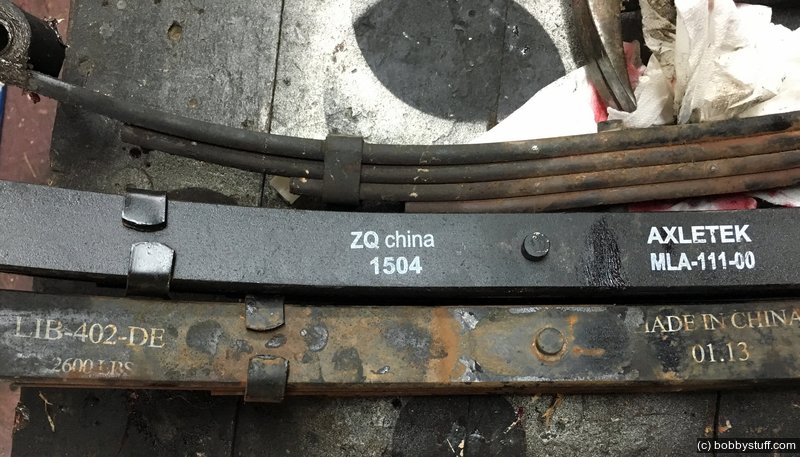
| 4 | 5-leaf Double-eye Spring For 6 000-lb Axles | $115.80 |
| 1 | Titan Brakerite Ehb Ele.-hyd. Actuator For Disc Brakes | $614.95 |
Both companies shipped the same day I ordered the parts and had free shipping. I upgraded to 2-3 day shipping for small fees. I had a great experience with both companies. I spoke with someone at KodiakTrailerBrakes.com to confirm the parts I needed and he was knowledgeable and easily answered my questions.
I discovered another thing that bugs me about American RV manufacturers. My Lippert 5,200 lb axles have 12 inch brakes, 4 leaf 2,600 lb spring leaves, and an outer hub bearing that is commonly used for 5,200 lb axles. The only difference between the Lippert 5,200 lb axle and the 6,000 lb Lippert axle is the leaf springs and the outer bearing. The difference in cost is probably less than $10. The axle tube and spindles are the same.
Why not put 6,000 lb axles under Vickie for an added safety margin? It makes no sense. I hate that about the RV industry. The gross weight rating for your RV will be either the combined weight rating of the tires or axles minus the pin weight. Which means if you load your RV to the max weight rating (and that is often what you will do because the cargo capacity is often 2,000 lbs or less) you will be running at 100% capacity on either your tires or your axles.
My new disc brake rotors have the 6,000 lb outer bearings and with swapping out the leaf springs I now have 6,000 lb axles. I don't plan to overload Vickie but I like having more safety margin.
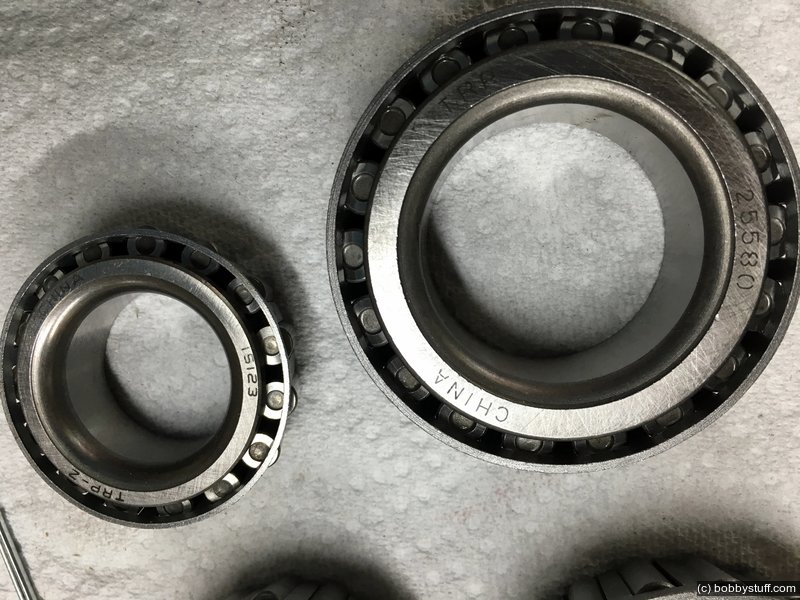
For those that need to know, below are the bearing numbers for various axles. With the drum brake hubs my outer bearing was a LM67048. The new disc brake hubs have a 15123 bearing. They both fit my spindle which I have discovered is an industry standard #42 spindle. The bearing races (or cups) in the hubs are just different. Notice that the same inner bearing, 25580, is used on three different axles.
| Capacity | Outer Bearing | Inner Bearing | Inner Cup | Outer Cup |
|---|---|---|---|---|
| 3,500 lbs | L44649 | L68149 | L68111 | L44610 |
| 5,200 lbs | LM67048 | 25580 | 25520 | LM67010 |
| 6,000 lbs | 15123 | 25580 | 25520 | 15245 |
| 7,000 lbs | 14125A | 25580 | 25520 | 14276 |
There is a popular bearing/seal kit that contains the 25580 bearing and cup, plus one each of the LM67048, 15123 and their cups plus grease seals, cotter pins and cap that runs $20+ dollars and works for 5,200 or 6,000 lb axles. These are common sizes and I easily found them at a local store called Agri-Supply.
I learned a few things with this project.
- The RV industry definitely needs a foreign competitor. If the Japanese built an RV in the US, the whole industry would make a better product. The current suspensions are junk and a safety issue. If you put many miles on your RV you are going to have suspension problems. I have had problems with a cracked spring hanger, worn spring shackles, worn spring shackles again, and broken springs. And don't get me started on exploding Carlisle tires, 15 inch to 16 inch tire conversion, and exploding ST tires.
- Your U-bolts are probably not tight enough. Half of mine were not much more than finger tight. Definitely not close to being 70 ft-lbs of torque tight.
- The bolts holding your backing plate to the axle are not tight enough. Again, half of mine were about finger tight..
- Your magnets and hubs are probably severely worn. Two of my 4 hubs had deep grooves (like 1/8 of inch or greater) where the magnets appeared to be continually rubbing the hub. So the magnets were worn irregularly also. The other two hubs and magnets were fine.
- You probably have grease on your brake shoes if you have the E-Z Lube system. I don't know why. I don't use an air grease gun. I pump the grease in slowly. But two of my four brakes were covered in grease because of failed grease seals. I know how to install grease seals without damaging them.
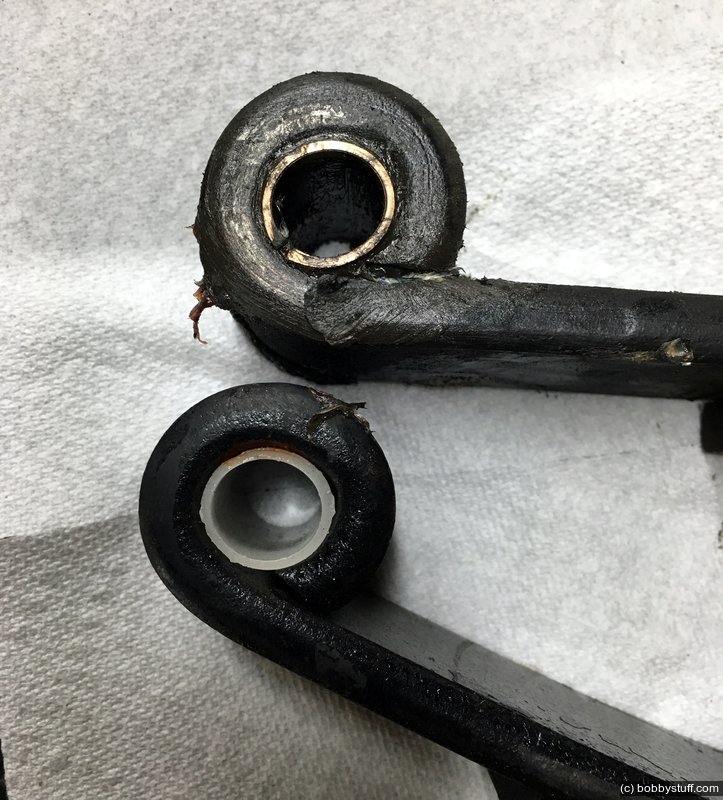
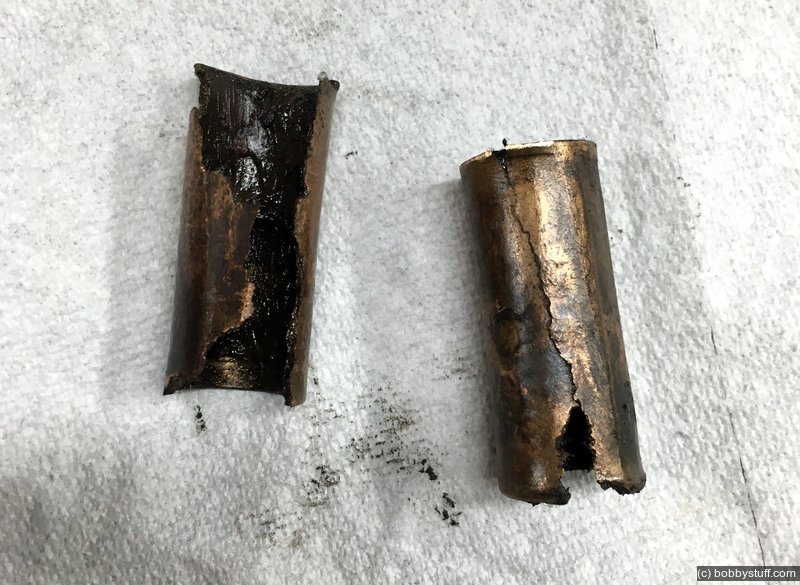
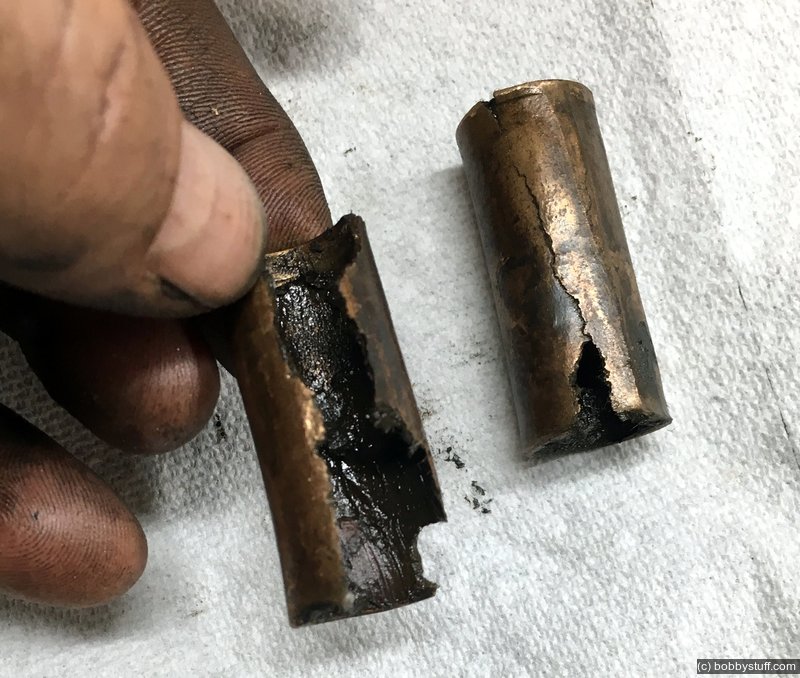
- You will probably never have a tight, secure connection between your spring hangers and shackles and the eye of your leaf springs. The nylon bushings that come as OEM will not last long. When I brought Vickie home for the first time I installed a
MorRyde Wet Bolt Kit
before I took her on her first trip. I thought that would solve most of my problems. It definitely solved the cheap, weak shackle link problem. But when I swapped out the springs, I found the bronze bushings were deformed and destroyed by the irregular spring eye.
 Oct 1, 2015 Thu 9:22:01 AM EDTiPhone 6s (625)2015 Disc Brakes on Vickie
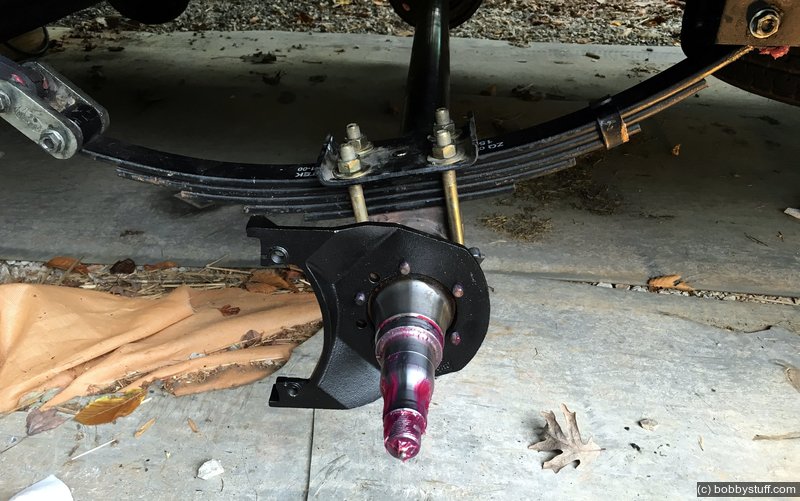
Replacing all the hardware took less than a full day. Running the brake lines and wiring the hydraulic actuator took probably another 4-5 hours because I pondered several ways of running the brake lines. Below are some photos of the install.

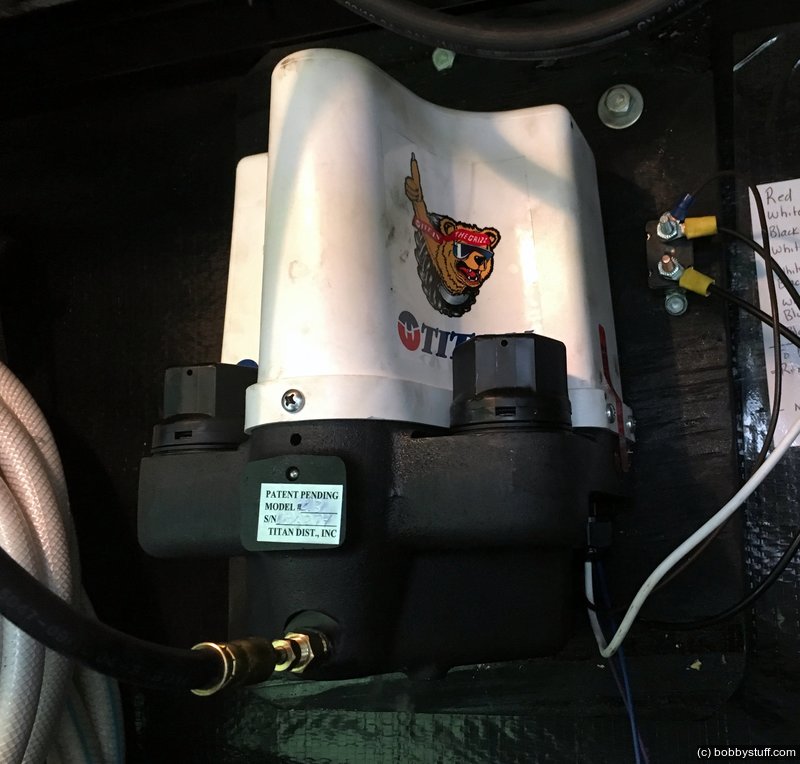
The wiring was pretty simple. +12 volt and ground wires, a blue wire that connects to the truck brake controller output and two wires for the breakaway switch.
The +12 and ground wires went to the camper battery. I used a 30 amp circuit breaker for the power.
For the existing brakes there were two wires, one blue and one white, both encased in a red outer insulation that I simply cut. I covered the white wire with tape and connected the blue wires together for the brake controller input. One of the wires from the actuator for the breakaway switch is intended to keep a breakaway battery charged on non RV trailers. I simply connected it to the battery.
That left one wire for the output of the breakaway switch. The existing wire was connected to the same blue wire that was connected to the truck brake controller and camper brakes. Since the hydraulic actuator has separate wires for the proportional input of the brake controller versus the full on power of the breakaway switch, I did not want to stick with this method. So I just disconnected the output wire of the breakaway switch from the existing blue wiring and ran a separate wire directly to the hydraulic actuator. I did not modify the orange wire feeding 12 volts to the breakaway switch.
Bleeding the air was simple. I just pulled the break away switch and bled the lines, checking a few times to make sure the actuator did not run out of brake fluid.
I have taken Vickie on a short 10 mile drag and I am impressed. When I apply the brakes there is a slight delay for the hydraulic pump to spool up but it is no big deal. And wow, there is a huge difference in the feel now that Vickie can stop her own weight and more.
I'll know more after I put a few hundred miles on her but for now I think I am going to be very happy.
EDIT Sep 2016
We took Vickie on a 5,000+ trip in July of 2016 from NC to NM, AZ, NV, UT and CO. After adjusting the brake controller I simply forgot about the RV brakes. They just worked and worked well all the time. Remember to bleed the brakes 2-3 times to remove all the air from the lines.
| Extra Loading Ramp |
Topics
TagsElectrical (18),Generator (7),Leaks (3),Lights (3),Springs and shackles (7),Tires (3)